Today we’re going to cover how to use one of the newer features in Phaser 3.5 that I personally am very excited about: Aseprite Atlas Sprites!
Atlas Sprites take away the need to define each of your sprite’s animations manually and let you focus instead on animating and coding game logic, letting Phaser take care of parsing all the individual animations.
If you’re unfamiliar with Aseprite, check out their website here. Aseprite is a popular program for drawing and animating spritesheets, and for good reason. It has many very useful features for drawing and animation such as a variety of drawing tools, onion skinning, layering, fine-tuned export settings, and animation tagging.
One other feature it has is the ability to export your spritesheets as optimized texture images, alongside a JSON Atlas file to allow game engines such as Phaser to interpret these images.
It is this feature we’ll be using for this tutorial.
The first thing you’ll need for this tutorial is a spritesheet in Aseprite (with a couple animations). If you haven’t got one handy, feel free to download mine here.
The first thing you’ll want to do to prepare your sprite is to tag the animations. In my example file, this is already done, but in order to do it on your own what you want to do is (for each individual animation):

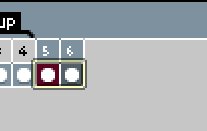
Select the frames you want included in the animation.

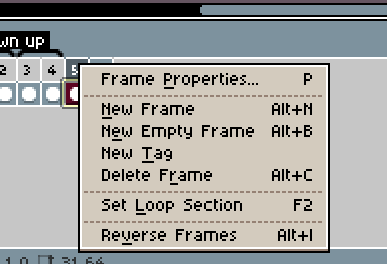
Right click on the frame numbers, then click “New Tag”.

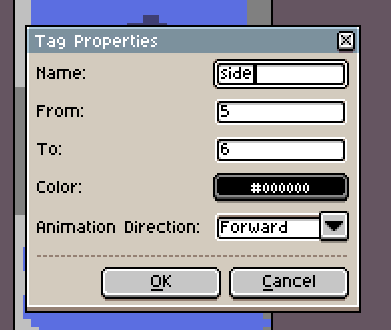
Fill out the name of your selected animation and click Ok.
Once you’ve tagged all your sprite’s animation names appropriately, you’re ready to move on to the next step: export settings.
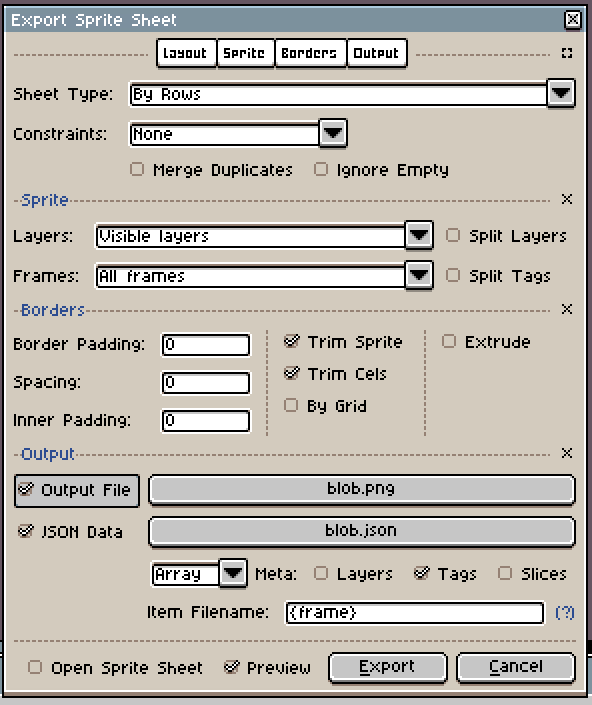
Make sure you’ve saved your .aseprite file somewhere, then click File > Export Sprite Sheet. Fill out the export settings as follows:

Make sure you set the following settings:
Borders
- Check Trim Sprite
- Check Trim Cels
Output
- Check Output File (set path to your game’s asset directory)
- Check JSON Data (set path to the same directory as the image)
- Select Array Meta
- Uncheck Layers and Slices, but leave Tags checked
- Set the Item Filename to “{frame}” only (important!)
After you’ve set those settings, hit Export!
Now that we have our asset files exported, we can move on to writing our code to load and utilize these assets!
Code part 1 - Boot scene loading:
import {Scene} from 'phaser';

class BootScene extends Scene {
  constructor() {
    super('scene-boot');
  }

  preload() {
    this.load.atlas('blob', 'assets/blob.png', 'assets/blob.json');
  }

  create() {
    this.anims.createFromAseprite('blob');

    this.scene.start('scene-game');
  }
}

export default BootScene;
In the above code we load our Aseprite atlas and texture files using the preload()’s this.load.atlas() function, then in the scene’s create() function, we parse the Aseprite animation tags using this.anims.createFromAseprite().
Code part 2 - Playing animations:
import {Scene} from 'phaser';

class GameScene extends Scene {
  constructor() {
    super('scene-game');
  }

  create() {
    this.blob = this.add.sprite(100, 100, 'blob');

    this.blob.play({ key: 'down', repeat: -1 });
  }
}

export default GameScene;
The second and final chunk of code for our tutorial is fairly straightforward. It creates an instance of our blob sprite on the screen using this.add.sprite() factory, then plays the blob’s ‘down’ animation via this.blob.play().
And that’s about it for Aseprite animation parsing with Phaser 3.5, thank you for reading!
And as always, happy hacking!
Love, Kirk M. (@saricden)
